
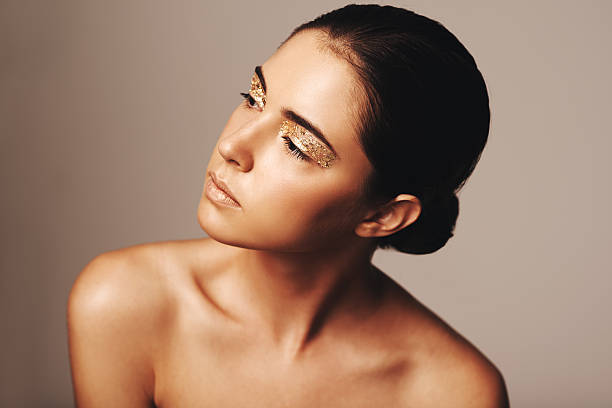
Bronze makeup, sun-kissed radiance is one of the most well-liked and sought-after cosmetic trends. Bronzed makeup can give you that flawless, radiant finish whether you’re going to the beach, attending a special event, or just want to add some warmth to your usual appearance.
However, getting the ideal bronzed look can be challenging, especially if you don’t know where to begin. To make it simple for you to replicate this look at home, we’re going to take a step-by-step approach and break down each step of the bronzing makeup procedure in this blog article.
If you prefer a video tutorial then here is a youtube sharing her point of view on the same topic.
Step 1: Preparing Your Skin
The first step in creating a perfect and long-lasting makeup look is to prepare your skin. It’s crucial to start out without any makeup on in order to achieve the best results. Wash your face with a mild cleanser to get rid of any dirt, oil, or makeup that may be on your skin. This will not only get your skin ready for makeup, but it will also help keep your pores clear and avoid breakouts.
It’s essential to moisturize your skin after washing your face to keep it hydrated and stop it from becoming dry and flaky during the day. To prevent any greasiness or stickiness, it’s crucial to pick a moisturizer that is lightweight and quickly absorbs into your skin. This can make your makeup look spotty and uneven.
Step 2: Applying a Primer
Prior to applying foundation, smooth the skin out and create a barrier between your skin and your makeup by using a primer. Your makeup will stay in place and last longer if you do this. For people with oily or mixed skin, a primer is especially helpful because it reduces shine and keeps your makeup looking good all day.
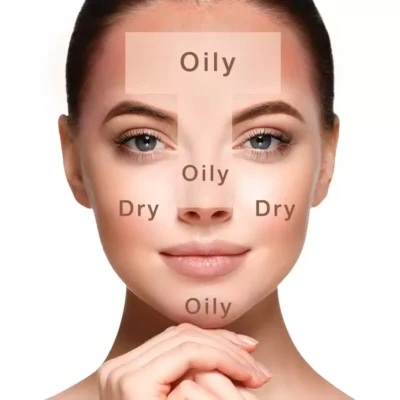
The T-zone (forehead, nose, and chin) is particularly important to cover with primer because it tends to get oily throughout the day and can make your makeup slide or smudge. Take a pea-sized amount of primer and massage it over your face with your fingertips. Prior to performing the next step, make sure to let the primer a few minutes to fully seep into your skin.
Step 3: Applying Foundation
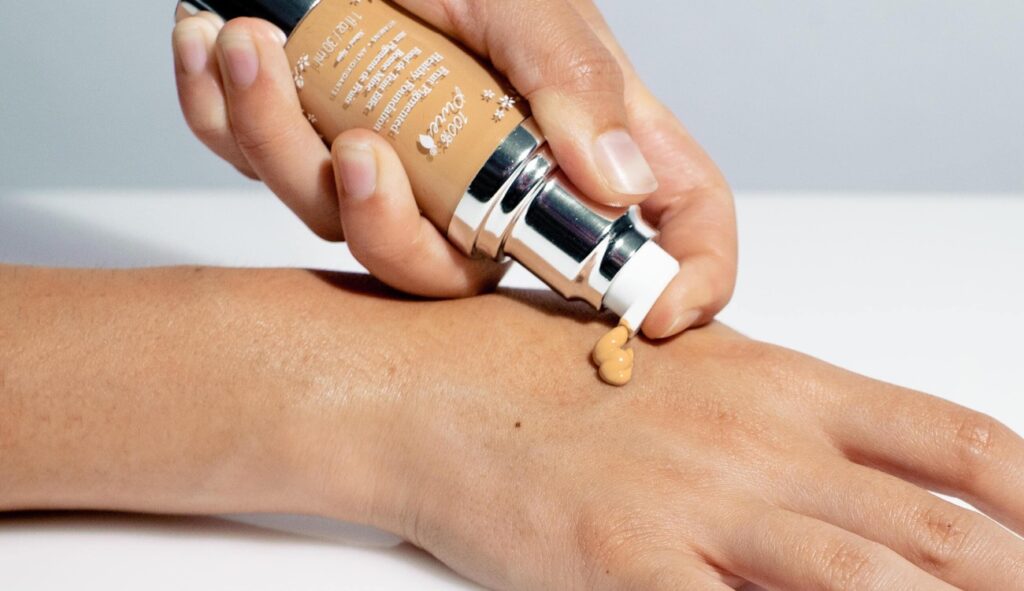
Applying foundation is the next stage in creating a bronze makeup look. It’s crucial to begin with a natural-looking foundation to establish an even foundation upon which to expand and embellish. Apply the foundation to your face using a brush or sponge, blending it in thoroughly to prevent any lines or streaks from showing.
It’s crucial to pick a foundation shade that closely resembles your skin tone while making this decision. Test shades on your jawline if you’re unsure of which one to pick since this area is less likely to be damaged by sun exposure. Apply a tiny amount of foundation at first, increasing coverage gradually, and use a soft hand to prevent caking. Additionally, it’s crucial to check that the foundation you select has a warm undertone to go with your bronzed appearance.
To obtain a natural-looking finish, it’s crucial to concentrate on blending when applying foundation. Focusing particularly on the hairline, jawline, and under-eye region, slowly work the foundation into your skin using a stippling brush, blending sponge, or your fingertips. Always blend downwards to prevent generating any wrinkles or creases, and be sure to blend well to eliminate any obvious lines or harsh edges.
Step 4: Applying Bronzer
A bronzer is a powder or cream cosmetic used to give the face warmth and definition. In order to achieve a bronzed makeup look, it is crucial. To simulate the effects of sun exposure, choose a bronzer that is one or two shades darker than your actual skin tone and has a warm undertone.
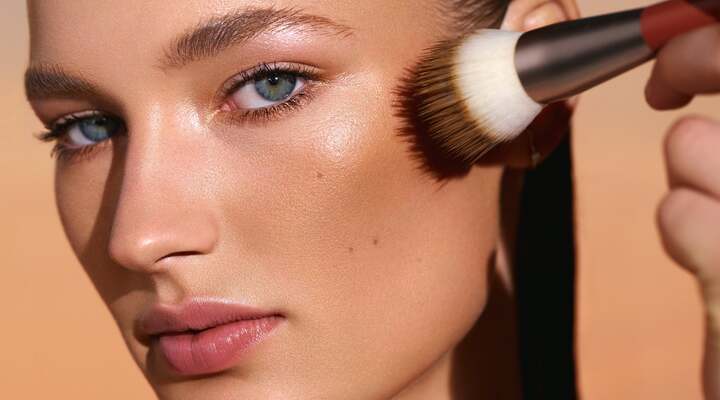
Apply bronzer to your chin, jawline, cheekbones, and forehead using a large, fluffy brush. Make sure to concentrate on the parts of your face that the sun would naturally touch, such as your cheekbones, nasal bridge, and temples. To prevent harsh lines, blend well using gentle hand movements and circular motions. It’s vital to avoid applying too much bronzer at once while applying it. The intensity can always be increased gradually.
By adding bronzer to the hollows of your cheekbones, your temples, and the area along your jawline, you may contour your face. Your face will take on more contour and definition as a result, appearing more chiselled and sculpted. Make sure to blend completely when contouring with bronzer to prevent any sharp lines or edges.
Step 5: Applying Highlighter
A substance called a highlighter is applied to the face to give it a soft glow. It’s a crucial step in achieving a bronzed makeup appearance since it gives the face depth and dimension. To match the bronzer, pick a highlighter that is 1-2 shades lighter than your natural skin tone and has a warm undertone.
Use a little brush to apply a highlighter to the high points of the face, such as your nasal bridge, Cupid’s bow, and the tops of your cheekbones. Applying it over the brows and on the inner corners of your eyes can give your eyes even more definition. To avoid a sparkly or icy appearance, make careful to blend thoroughly. Apply the highlighter with a tapping motion rather than a sweeping motion to prevent over-application.
Step 6: Applying Blush
A blush is a cosmetic item that is applied to the cheeks to enhance color and give them a flushed appearance. It’s a crucial step in producing a bronzed makeup look because it contributes to a polished appearance and gives the face a splash of color. Pick a blush that closely resembles the color that would naturally appear on your complexion after exposure to the sun, such as peachy or coral hues.
Apply the blush with a brush to the apples of your cheeks and blend lightly and in circular motions up towards your temples. This will contribute to a more organic, unified appearance. Use a soft touch and increase the intensity gradually when applying blush. Applying too much product at once might give the cheeks an artificially pink appearance.
Step 7: Setting Your Makeup
It’s not necessary to do this step, but it will help keep your makeup in place and stop it from melting or slipping off throughout the day. To fix your makeup, use a setting powder with a soft brush or mist setting spray onto your face while holding it about 10 inches away. To prevent any caking or patchiness, apply the powder or spray evenly.
Step 8: Finishing Touches
A lip color that goes well with your bronzed appearance might be used to complete the effect. You might choose a lipstick or lip gloss that looks natural and matches your blush or any other color you choose.
Conclusion
In conclusion, bronzed makeup is a fantastic approach to giving your face more warmth and definition. You can obtain a gorgeous, natural-looking bronzed cosmetics appearance that lasts all day by following these instructions. Blending, blending, and more blending—that is the key to flawless bronzed makeup! For a finish that looks natural, ensure that all of your products are well-blended. To find the ideal bronzer and highlighter for your skin tone, don’t be afraid to experiment with various colours and formulations. You have all the information and advice you need to achieve the ideal bronzed makeup appearance thanks to this tutorial.
3 thoughts on “Bronze Makeup Tutorial: A Step-by-Step Guide for a Natural Bronze Makeup”