
All skincare fans must have heard of facial steaming. Over the years many influencers and self-care enthusiasts have incorporated steaming into their skincare routine. It became famous when it was discovered that the heat from steam can unclog pores and increase circulation. But what does steaming mean? It surely can’t just be letting your face sit in steam emitting out of a boiling pot of water. Although that might work, there is a process for steaming your face. Before steaming, some preparation must be done and a few steps after steaming your face, to achieve the maximum benefit of steaming.
Therefore we decided to compose this article. In this article, we will tell you all you need to know about before and after steaming face, including :
- Precautions
- The science behind steaming
- The action of steaming on different skin types
- What to do before steaming your face
- How to steam your face
- What to do after steaming your face
- Steaming your face Benefits
Precautions: things to consider before steaming your face
Steaming face may be beneficial for the skin, but it may cause more damage than benefit if you are suffering from skin conditions. These conditions include but are not limited to, rosacea, eczema, inflammatory diseases, and dry skin. If you have sensitive skin or any other condition, consult your dermatologist before and after steaming face or choosing the base and essential oils.
The action of Steam on different skin types
| Skin Type | Impact of Steam |
|---|---|
| Oily Skin | Steam reduces the appearance of blackheads and also regulates sebum production |
| Dry Skin | The steam hydrates and replenishes the moisture in the skin, at the same time, increasing the skin’s ability to retain moisture. |
| Combination Skin | For combination skin, steam has a double action. It regulates sebum production in oily areas while hydrating the drier ones. |
| Sensitive Skin | A decrease in redness and inflammation. However, it is to be noted that only mild herbs are used and the steam is kept at a comfortable temperature to avoid agitation of the skin. |
| Acne Prone Skin | Inflammation is lowered significantly. However, it is essential to avoid over-steaming as it can dry out the skin and lead to more breakouts. |
| Aging Skin | Steam increases collagen production, resulting in reduced appearance of fine lines and wrinkles. The overall health of the skin also improves by removing dead cells and promoting cell turnover. |
The Science Behind Steaming Your Face
Isn’t as complicated as you may think. The heat and energy from energetic steam particles cause 2 processes in particular to occur:
- The pores on your face all open up (dilate) due to the heat. This makes it easier for the dirt, grime, dead cells, and impurities stuck in the pores to be brought out.
- There is a drastic increase in perspiration due to the heat of the steam. Alongside open pores, this allows easier removal of toxins, mainly urea and lactic acid which damage the skin.
Moreover, facial steaming dilated blood vessels and pores increasing blood flow and oxygen to the skin, bringing a richer supply of nutrients to the face.
Preparing: Steps Before Steaming Your Face
To start the procedure, you must have the base or the “steam emitter”. The choice of what to steam your face with primarily depends on your affordability range and desired result. The most expensive base is herbal tea. Packed with antioxidants, it helps clean and nourish your skin. It’s the base preferred by most, thanks to its uncountable benefits after steaming your face. However, distilled or tap water free of sediments would do the job, as they both really aren’t that different. You can further enhance it by adding a variety of essential oils or herbs. a few of the recommended oil:
- Lavender: The soothing effect heals dry skin and eczema. Filled with natural antibacterial properties that cleanse, it softens the skin, it’s suitable for dry and sensitive skin.
- Chamomile: Along with curing aging wrinkles, acne, and inflammation, it’s a natural detoxifier.
- Tea tree: Has an antifungal effect and cleanses pollutants from the skin while also healing acne
- Eucalyptus: Its anti-inflammatory effect is best for dermatitis and acne. It also promotes the growth of natural ceramides and is abundant in antioxidants.
- Peppermint: the natural detoxifier has a cooling effect and antiseptic properties. It’s the best for oily skin with acne.
- Lemon: decreases pore surfacing by tightening the skin’s appearance and eliminates bacterial infection.
- Clove: Along with its antibacterial properties, it’s the best choice for eliminating wrinkles and achieving velvety youthful skin.
- Oregano: The antioxidant, exfoliating, and moisturizing properties in this herb make sure your skin is safe from damage caused by free radicals, and alongside removing dead cells, it leaves your skin feeling hydrated after steaming.
Hydrating yourself with plenty of water beforehand can help your body adjust to the change much more efficiently. An increase in temperature promotes profuse sweating, so to compensate for lost water after steaming, it’s crucial to stock up beforehand.
Your hair covers quite a fraction of your face when steaming. To expose the entirety of your face, bind your hair in a pony, towel, or with an elastic headband (for short hairs and bangs specifically).
Exfoliating your face is a crucial step. After steaming, it prevents any impurity already present on the face from getting into your pores and re-clogging them with debris.
Although it’s optional to many, we suggest you make yourself cozy in your favourite spot with your favourite playlist playing in the background. Along with your skin, your mind will relax and replenish after you’re done steaming. Allow yourself a break!
Note
These preparation steps apply to all of the steaming methods and must be carried out
How To Steam Your Face At Home
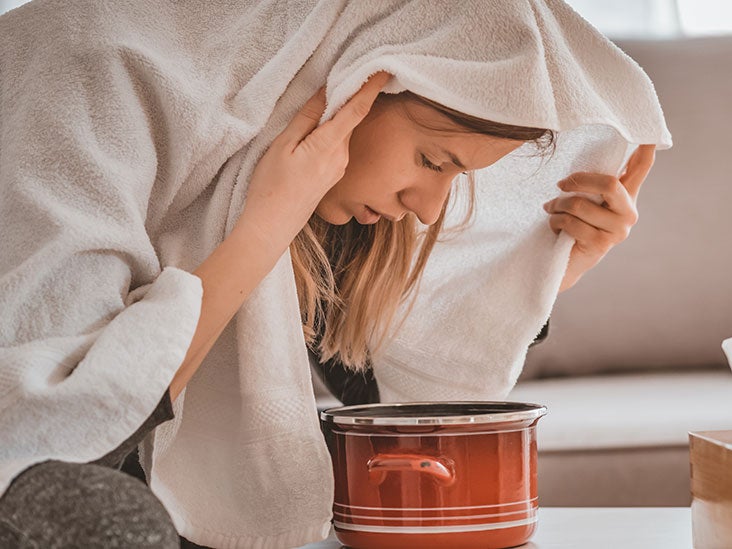
Method 1: Steam From Bowl
For convenient in-home facial steam, you will need a few cups of water, a large container or a sink, some towels, and a comfortable area. Once you have gathered all the necessities, follow the step explained:
- Pour water into a boiling pot or an electric kettle. Bring it to a complete and thorough boil. If you chose to go with tea as a base, it’s time to add it. You can add your desired herbs too. After the water has bubbled for quite a few minutes, transfer it to a bowl or pour it into the sink.
- Now you can add any essential oil you want to, and wait for a few minutes. If you steam your face immediately after the water has boiled, the steam can be hazardous and can cause burns, to avoid this let the water sit for a few minutes and reach a safe temperature.
- Keep your face at least 5-7 inches away from the source, and enclose your face in the steam with the help of a towel. Make sure to cover the source completely, yet leave tiny gaps to avoid suffocation. This directs the steam toward your face. You mustn’t open your eyes while steaming for any reason.
- Adjust your head and towel position according to requirements. You can undrape the towel when it feels too hard to breathe or too hot. Steam your face for at least 5 to 10 minutes, but no more than 15 minutes.
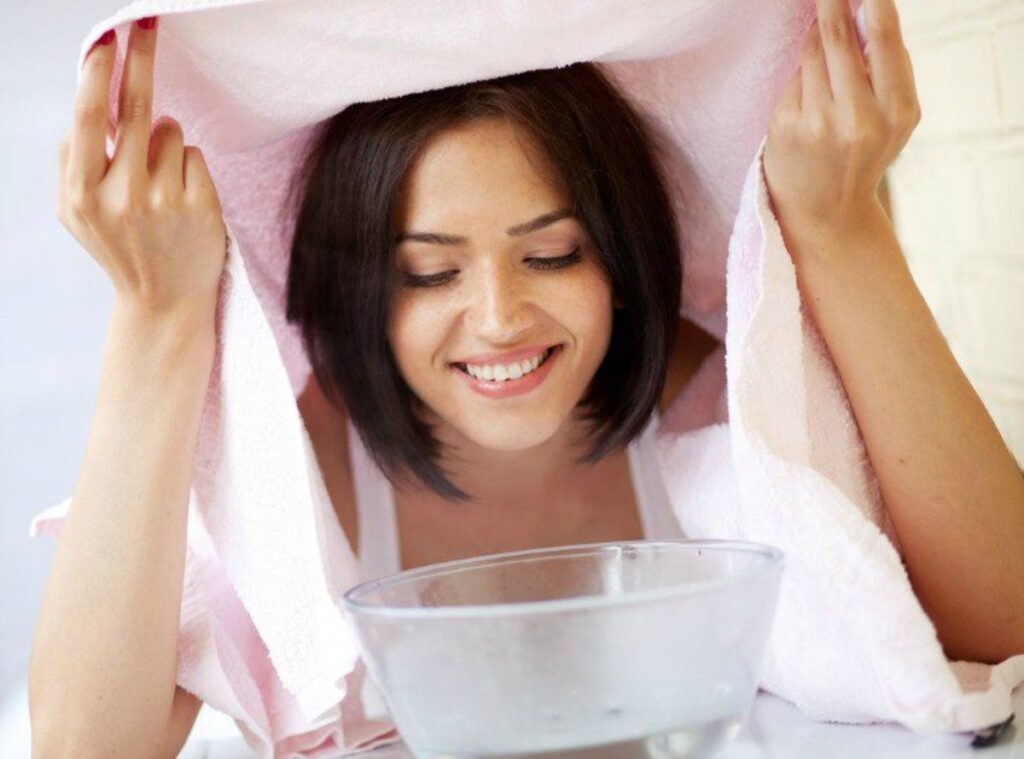
Method 2: Damp Towel
If standing over steam seems too dangerous and tedious for you, you can opt for the second option. It’s much easier and a lot more convenient.
- Boil your water with the required herbs or tea. After it has simmered for a few minutes, pour it into a bowl or sink
- Add in some essential oils and dip your towel in the prepared base.
- Wring out the towel and place the damp towel on your face. Position the towel around your nose leaving it out for breathing. your entire face must be covered except for your nose.
- Let the towel sit for at least 10 to 15 minutes.
Method 3: The Steamer
A much more expensive yet effective method. Instead of manually boiling the water for steam, you can purchase a steamer to do the job. Compared to other methods, a mechanical steamer produces more and harsher steam. therefore the results are a lot more apparent and quicker, though it does require more caution. To steam using a steamer start by
- Read the steamer’s instruction manual and fill the steamer accordingly. Add essential oil and herbs and turn the steamer on.
- It may take some time for it to produce steam. Once it does, place your face 7-10 inches away from the cone of the steamer, based on the steam intensity. Drape a towel over it and your face to soak up the steam.
- Steam your face for about 10 to 15 minutes with a 1-minute break between every 3 to 4 minutes.
Aftercare: What To Do After Steaming Your Face
To benefit to the max from facial steaming you must know about the aftercare steps. The most important thing that you must remember is after facial steaming the skin will be extra sensitive and exposed which makes it an easy target of many irritants and pathogens. therefore it’s compulsory to protect it.
- Right after steaming your face, it’s essential to wash your face with warm water, to clean off all the sweating induced by the steam. dry it with a soft paper towel using a tapping motion. you must avoid rubbing as it may cause redness and inflammation.
- To balance your pH level back to normal, you must apply a toner. it removes the sweat residue left after steaming and makes your skin look a lot more radiant and healthy
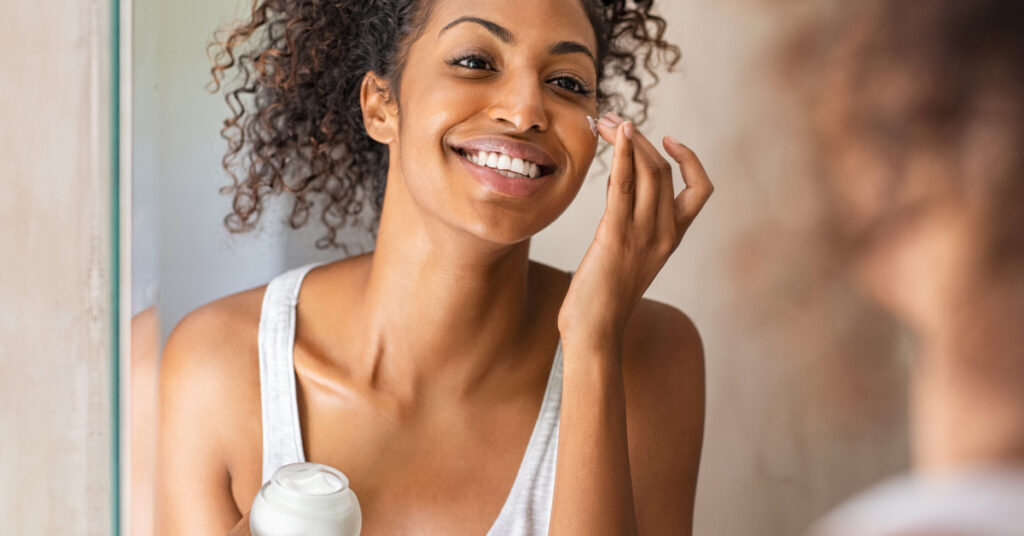
- Your skin has been through a tough ordeal and is dehydrated so you must moisturize it. A moisturizer can help hydrate and soothe the dried-up skin, and protect it as well.
- To further clean the open pores from steaming, use a cleansing mask. it can enter the pores and remove any impurity that was left.
- For maximum results, steaming is the best time to apply any serum or cream related to the skin condition you’re trying to tackle, for example, aging, acne, dark circles, and pores.
- Massage all the serums, oil, or any other ointment that you decided to use, on your face. After steaming, your face is at its most exposed and relaxed state and a massage will strengthen your facial muscles and thoroughly absorb the product.
- Apply SPF to protect your delicate skin against any UVA/UVB rays in case you are planning to expose yourself to sunlight.
You must consider your skin type and follow the mentioned steps accordingly. Different skin types have different reactions to steaming, so if you face any type of negative response after steaming immediately contact your dermatologists. you must only steam 2-3 times per week, do not overdo it, as it can have adverse side effects.
After Steaming your Face Benefits
As we mentioned throughout the article, steaming your face widens your pores and forces all the debris out, now let’s talk about its other benefits. It’s an affordable technique that deeply cleanses your face and increases blood circulation. The circulating blood results in the synthesis of elastin and collagen. Together after steaming, they contribute to firming and making the skin youthful and, therefore, produce an anti-aging effect.
Sebum rooted under the skin inhibits various types of bacteria, and steaming pulls the sebum out from under the skin. The elimination of bacteria decreases the chances of acne and blackhead. The addition of herbs and essential oils hydrates the skin and after steaming, leaves it looking nourished and radiant.
Overall steaming is a relatively easy and budget-friendly procedure that can be performed in the comfort of a home. Though it may seem easy it requires extensive research for it to be beneficial. It’s a highly effective and organic way to refresh your skin and mind, so contact your dermatologist and give steaming a try !!
I needed to thank you for this excellent read!! I definitely enjoyed every little bit of it. Ive got you book-marked to look at new stuff you postÖ
Nice post. I learn something totally new and challenging on sites I stumbleupon everyday. It will always be exciting to read content from other writers and practice a little something from other sites.
Next time I read a blog, Hopefully it wont fail me just as much as this particular one. After all, Yes, it was my choice to read through, however I actually thought you would have something useful to say. All I hear is a bunch of whining about something you could fix if you werent too busy looking for attention.
Greetings! Very useful advice in this particular article! It is the little changes that produce the most important changes. Thanks a lot for sharing!
I was very pleased to discover this web site. I want to to thank you for your time due to this wonderful read!! I definitely savored every little bit of it and I have you book marked to see new things in your website.
Can I simply just say what a relief to find an individual who actually knows what they are talking about online. You actually know how to bring a problem to light and make it important. More people ought to read this and understand this side of your story. I was surprised you are not more popular since you certainly possess the gift.
This is the perfect blog for anybody who really wants to understand this topic. You know a whole lot its almost hard to argue with you (not that I actually would want toÖHaHa). You definitely put a brand new spin on a topic that has been written about for ages. Great stuff, just wonderful!
I must thank you for the efforts youve put in penning this blog. Im hoping to view the same high-grade blog posts from you later on as well. In fact, your creative writing abilities has inspired me to get my own, personal blog now 😉
Good post. I learn something totally new and challenging on websites I stumbleupon on a daily basis. Its always exciting to read content from other writers and use something from other sites.
I would like to thank you for the efforts youve put in writing this blog. I am hoping to see the same high-grade content by you later on as well. In fact, your creative writing abilities has motivated me to get my own website now 😉
I have to thank you for the efforts you have put in penning this site. Im hoping to see the same high-grade content from you in the future as well. In truth, your creative writing abilities has inspired me to get my very own website now 😉
Everything is very open with a clear clarification of the issues. It was truly informative. Your website is very useful. Thank you for sharing!
I was very pleased to discover this page. I wanted to thank you for ones time due to this wonderful read!! I definitely appreciated every little bit of it and I have you bookmarked to see new things on your blog.
Very nice article. I definitely appreciate this site. Continue the good work!
Greetings! Very useful advice in this particular article! Its the little changes which will make the most important changes. Thanks a lot for sharing!
I was excited to find this website. I wanted to thank you for your time just for this fantastic read!! I definitely liked every part of it and I have you book-marked to look at new things in your blog.
Howdy! I just would like to offer you a huge thumbs up for your excellent info youve got here on this post. Ill be coming back to your site for more soon.
Greetings! Very useful advice in this particular article! Its the little changes that make the greatest changes. Many thanks for sharing!
Hi there! I just would like to give you a big thumbs up for the excellent info youve got here on this post. I am returning to your web site for more soon.